
Garage Floor Coating Prep: Grinding, Repairs, and Moisture Testing
Preparation is most of the labor and nearly all of the risk on a garage floor coating. A technical walkthrough of diamond grinding versus acid etching, ICRI profile requirements, ASTM moisture testing, crack and joint repair, and verification.

Preparation is the majority of the labor on a garage floor coating and essentially all of the risk. Everything that decides whether the film is still bonded in ten years happens before it goes down: how the slab was profiled, whether contamination came off, whether moving cracks were treated as moving, and whether anyone tested for vapor drive from below. Coatings rarely fail because the product was wrong. They fail because the surface was never made ready, which is why the crews at CreteWorx in Castle Rock spend most of a job here.
What Garage Floor Coating Prep Has To Accomplish
Prep has four jobs: remove everything that is not sound concrete, create a profile the coating can key into, repair defects that would telegraph through a thin film, and confirm the slab is dry and clean enough to bond.
The profile requirement is not opinion. The International Concrete Repair Institute publishes the Concrete Surface Profile system, replica chips numbered CSP 1 through CSP 9 that define how rough a prepared surface is. Thin-film systems such as most garage coatings generally call for the lower part of that range, commonly CSP 2 to CSP 3, while thicker builds need more. The manufacturer publishes the required number on the data sheet, and a contractor should be able to name it without looking.
The Prep Sequence on a Professional Garage Job
Prep runs in a fixed order, because each step depends on the last.
- Clear and assess. Map cracks, joints, spalls, oil, patches and any existing coating on bare concrete.
- Test before grinding. Moisture testing plus a check for sealers or densifiers, which take time to set up.
- Degrease, so the grinder does not drive oil into open pores.
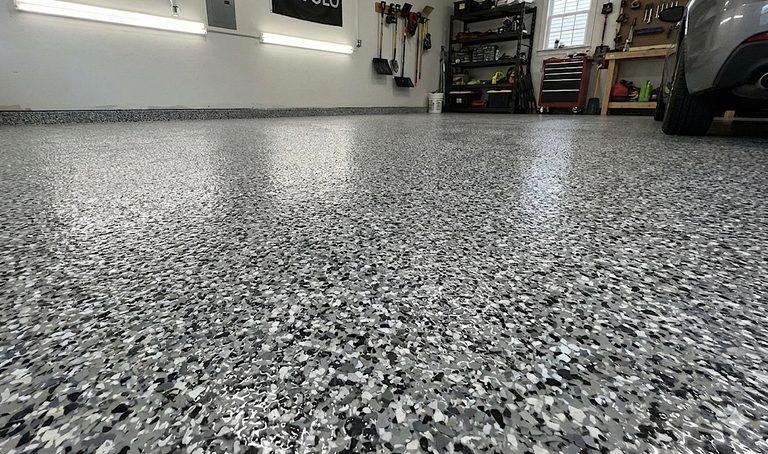
- Grind the field to the data sheet profile.
- Hand grind edges, corners and obstructions. Always a separate operation.
- Repair. Fill static cracks, treat joints, patch spalls, grind flush.
- Verify with a water drop test and a CSP chip check.
- Vacuum and tack immediately before coating.
- Check conditions against the published window.
- Coat. Only now.
Assessment and Testing Before Anything Is Ground
The assessment finds surprises while they are still cheap to solve. On a first walk:
- Existing coating or sealer, shown by beading water, a sheen, or a color shift at the door line.
- Densified concrete, common wherever a hardener was used, and impossible to etch chemically.
- Cracks and joints: width, vertical offset, and whether a crack stops at a control joint or crosses it.
- Spalling and popouts, worst near the door where de-icer off tires works through Front Range winters.
- Oil stains and their likely depth, plus efflorescence, a bond breaker and a sign water is moving through the slab.
Diamond Grinding vs Acid Etching a Garage Floor
Diamond grinding is the standard for residential garage prep, and acid etching is not an equivalent substitute. Grinding is mechanical: diamond-segment tooling removes laitance, old coatings, curing compounds and contaminants, opens the pore structure, and leaves a measurable profile. Etching is chemical: muriatic, phosphoric or citric acid reacts with cement paste to roughen it, and that is all it does.
| Factor | Diamond grinding | Acid etching |
| Removes coatings and sealers | Yes | No |
| Removes oil and curing compounds | Yes, with degreasing | No |
| Works on densified concrete | Yes | No, the acid cannot reach the paste |
| Profile consistency | Repeatable, measurable against CSP chips | Varies with slab hardness, acid strength and rinse |
| Residue risk | Dust, removed by vacuum and tack | Reaction salts that must be neutralized and rinsed, plus the rinse water |
| Warranty acceptance | Generally accepted | Many manufacturers require mechanical prep |
To be fair, etching is not useless. On a clean, bare, never-sealed slab it can open the surface enough for some products, which is why it survives in consumer kits. But it is the most common corner cut in low bids, and it works in far fewer conditions than it gets used in. Cost questions belong on our garage floor coating cost guide.
Shot Blasting, Edges and Dust
Shot blasting propels steel shot at the surface and recovers it. Fast and aggressive on open areas, it suits warehouse slabs, but it leaves tracks in corners and along edges that still need grinding, and it handles oil-saturated or soft concrete poorly. Scarifying and scabbling suit heavy buildup or resurfacing, not a thin film. Edges and corners always need hand grinding whatever did the field, and skipped edge work leaves a band of unprofiled concrete where the coating lifts first.
Dust control on concrete grinding is governed by the OSHA respirable crystalline silica standard for construction, 29 CFR 1926.1153, and professional crews use shrouded tooling on HEPA-filtered vacuums. That matters because most Castle Rock garages are attached, sharing a wall and often an air path with the house.
Concrete Moisture Testing Before Epoxy or Any Coating
A concrete moisture test before epoxy is not optional on a slab on grade. Concrete on grade transmits soil vapor continuously, and under an uncoated floor nobody notices. Put a vapor-impermeable film on top, pressure builds at the bond line, and the coating blisters and delaminates. The coating did not fail. The slab did, and nobody checked. Many older Front Range garages have no vapor retarder beneath the slab, and looking will not tell you.
| Standard | Method | What it tells you | Limitations |
| ASTM D4263 | An 18-by-18-inch polyethylene sheet taped down on all edges, checked later for condensation. | Qualitative pass or fail screen. | A screen, not a measurement. It can pass a slab that still has a problem. |
| ASTM F1869 | Anhydrous calcium chloride: a weighed desiccant dish under a sealed dome, reweighed later. | Moisture vapor emission rate, in pounds per 1,000 square feet per 24 hours. | Reads near the surface only, so it can miss what is deeper. |
| ASTM F2170 | In-situ relative humidity probes in drilled holes, left to equilibrate. | Internal relative humidity as a percentage, at depth. | Needs drilling and equilibration time. Generally the more reliable indicator. |
There is no universal pass number, and anyone who quotes one is repeating a rule of thumb, not a standard. Manufacturers publish their own maximum allowable emission rate and internal relative humidity, and limits vary by product and primer. Ask not "did it pass" but "what did it read, and what does this data sheet allow."
Why Colorado's Dry Air Does Not Solve This
Low ambient humidity does not protect a slab, because the vapor drive comes from the ground, not the air. Irrigation along the foundation, snowmelt running under the slab edge, and seasonal groundwater push moisture up no matter how dry the garage feels. There is a self-inflicted version too: grinding and then washing a slab puts water into freshly opened concrete, which has to dry before testing and coating.
If the Slab Tests Over the Limit
The answer is a moisture-mitigating primer or a vapor barrier system built for that condition, not proceeding and hoping. Coating over the limit risks blistering across the whole floor and typically voids the warranty.
Garage Floor Crack Repair Before Coating
Garage floor crack repair before coating starts with one distinction: static or active. Static cracks can be permanently filled. Active cracks move seasonally, and anything rigid across them gets torn open and reappears through the coating.
Static Cracks
Static cracks are chased or saw cut open into a clean, sound-sided channel, vacuumed out, filled with a rigid epoxy or polyurea filler often bulked with sand, then ground flush. Chasing matters: a hairline crack filled without opening it leaves almost no surface to bond to. Reading cracks is its own skill, covered in our guide on spotting and repairing concrete cracks before winter.
Control Joints and Saw Cuts
Control joints exist to control where the slab cracks, and they keep doing that under a coating. Two legitimate treatments exist: honor the joint through the coating, cutting the film and leaving a visible line, or fill it with a semi-rigid joint filler designed to flex. What does not work is rigid fill with coating over the top. The slab moves, the fill cannot, and a reflective crack appears within a season or two.
Spalling, Pitting and Oil
Spalls, pits and popouts get patched with polymer-modified cementitious material or an epoxy mortar, feathered and ground flush. The grinding is not cosmetic: a patch left proud telegraphs through a thin film as a ridge, and flake will not hide it.
Oil and grease get degreased first, then ground, and in bad cases ground deeper or primed with an oil-tolerant primer. Order matters, since grinding a saturated area first pulls contamination in. Our notes on removing stains from concrete cover the cleaning side. Oil migrated deep over years genuinely limits what a coating can do, and an honest contractor says so at the estimate.
Previously Coated Floors, Sealers and Densifiers
An existing coating generally has to come off mechanically and completely, the most common source of a change order on a garage job, because the labor is hard to judge until grinding starts. Sealers and densifiers come off too, and a densified slab is the clearest reason etching fails: no exposed paste is left.
Verifying the Prep Worked
The fastest field check is the water drop test. Sprinkle water across the prepared slab in several spots: it should darken the concrete and absorb readily and uniformly. Beading or patchy absorption means contamination, sealer or an inadequate profile remains, and grinding is not finished.
Then compare the surface against ICRI CSP replica chips, and vacuum and tack immediately before coating. Grinding dust is itself a bond breaker, so a floor ground days ago and left open is not clean.
Application Window Conditions
Substrate temperature, ambient temperature, relative humidity and dew point all have to sit inside the manufacturer's published window during application and cure. Dew point catches people out: manufacturers commonly require the substrate to be at least 5 degrees Fahrenheit above it, because condensation under a curing film destroys adhesion.
In Colorado that is a real scheduling constraint. Big daily swings mean a slab warm at noon can drift toward dew point overnight while the coating cures, and an unheated garage in shoulder season can sit below minimum substrate temperature. It is part of why choosing the right concrete coating for your garage depends on timing.
What Failure Looks Like
Nearly every garage coating failure traces back to a prep decision. Each gets fuller treatment in our concrete coatings resources:
- Peeling and delamination: an adhesion problem, almost always traced to profile or contamination.
- Hot tire pickup: a warm tire lifts the coating off the slab.
- Blistering and bubbling: moisture vapor from below pushing the film off.
- Reflective cracking: a slab crack or joint telegraphing through the new floor.
- Telegraphed patches and grinder swirl: repairs not ground flush, and grinding marks showing through.
Questions to Ask Your Contractor
Five questions separate a prep-first installer from a fast one.
- What CSP does this system's data sheet require? They should name a number, not just "we grind it."
- What moisture test will you run, against what limit? Look for a named ASTM method and a data sheet, not reassurance about dry Colorado air.
- How are control joints being treated? Honored through the coating, or filled with a semi-rigid filler. Rigid fill is wrong.
- Is edge and corner hand grinding included? Stated, not assumed.
- What happens if the slab tests over the moisture limit? A mitigating primer or vapor barrier system, and what that changes in scope.
How to Prep a Garage Floor for Coating Yourself
A homeowner can realistically handle cleaning, assessment and simple crack work: degreasing, taping down a plastic sheet for an ASTM D4263 screen, sorting static cracks from active, and filling a static crack.
Grinding is where the line sits. A rental walk-behind grinder with worn tooling and a shop vacuum will scuff a floor, and scuffing is not profiling. The machine has to be heavy enough and the tooling aggressive enough to cut consistently; the operator has to avoid gouging and swirl, edges still need a hand grinder, and dust needs HEPA extraction rather than a shop vac blowing silica through an attached house. No rental counter hands out calcium chloride kits or RH probes, so DIY grinds an untested slab.
Our overview of DIY versus professional concrete repairs and our list of concrete repair mistakes DIYers should avoid both apply. The risk is not that a DIY coating looks bad on day one. It is that grinding off a failed one costs more than the install would have.
Frequently Asked Questions
Is diamond grinding or acid etching better for a garage floor?
Diamond grinding, in nearly every residential case. Grinding removes coatings, sealers, curing compounds and contamination and leaves a measurable profile, while etching does none of that and varies with slab hardness and rinse quality. Many manufacturers require mechanical prep for warranty coverage.
Do I really need a concrete moisture test before epoxy on a garage slab?
Yes, on any slab on grade. The film is vapor-impermeable and the concrete under it transmits soil vapor continuously, so untested moisture is a leading cause of blistering and delamination.
How do I prep a garage floor for coating that has never been coated?
A bare slab still needs the full sequence: assess, moisture test, degrease, grind to the required CSP, hand grind edges, repair cracks and spalls, verify, then vacuum and tack. Never having been coated makes the job cleaner, not shorter.
What is the right way to handle garage floor crack repair before coating?
Separate static cracks from active ones first. Static cracks get chased open, cleaned, filled with a rigid epoxy or polyurea filler and ground flush. Active cracks and control joints are honored through the coating or filled with a semi-rigid filler.
How long does garage floor coating prep take?
Prep occupies the majority of the project labor on a typical residential garage, and testing adds lead time before anyone arrives with a grinder. ASTM F2170 probes need time to equilibrate, so testing is scheduled ahead of install.
Can a new coating go over an existing epoxy floor?
Usually not. The old system generally has to come off mechanically, because bonding to a failing coating inherits its adhesion problem.
Get the Prep Right the First Time
A coated garage floor is only as good as the hours of grinding, patching and testing nobody photographs. With proper preparation and sealing, high-quality coatings can last 10 to 15 years or longer, and most garage projects finish in 1 to 2 days depending on size and finish. Rushed, they look identical on day one and tell the truth in year two. To have a slab in Castle Rock, Douglas County or the south Denver metro assessed properly, with a real moisture test and a straight answer about what your concrete will support, reach out to the CreteWorx team for a free estimate.
Written by CreteWorx · Castle Rock, CO


